DIY Toy Storage Bins
Kids come with toys.
Lots and lots of toys.
Piles of toys.
Loads of Barbie dolls, cars, figurines, play food, and random crap .... This is not an infomercial.
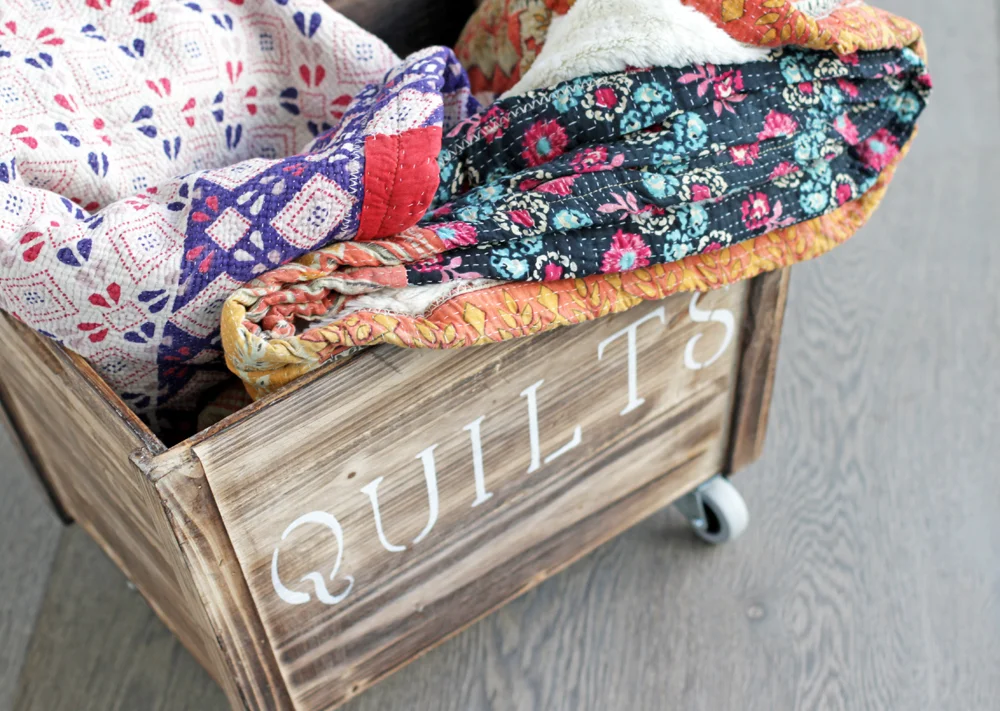
If you want to clean up all the crap in your life and you need totally awesome rustic crates to store all your toys, make these beautiful rolling storage crates! Aren't they lovely? Well, I think so. I made these on Home and Family on the Hallmark Channel (you should be watching by now folks 10am/9c). If you missed the episode you can watch by clicking on the link above or scroll down and see the tutorial below!


What you need
1 crate (from Home Goods or Michaels)
4 - 2" swivel casters
16 - 1/2" screws
Wood glue or hot glue
4 square bits of wood
Screw driver
Stencils
Wood paint
Paint brushes
Directions
1. Flip your crate over and place your casters in place. Screw down all four casters. If you have a thin base on your crate the screws will poke through the bottom so you can glue a square scrap piece of wood on the inside to catch the screw.
** If this is the case I recommend gluing down the piece of wood with hot glue and letting it dry on the inside corners of the crate before you screw the casters on.
2. Flip your crate over and stencil your letters on one side and let dry.
Tips: if you are making the shelves you will want to flip all the crates on their sides and screw them to one and other using screws and bolts.