Easter Bunny Clothespin Couple
I Love clothespins!
Oh yes I do.
Oh yes I do.
Easter just wouldn't be the same without some super cute pastel Easter bunny clothespins! I gave Sheena the task of making some Easter bunny clothes pins because our wedding couple clothes pins were just so freaking fabulous. She made these and I think they are pretty awesome. These clothespin bunnies are perfect as a small cute decoration by itself or as a place card holder for Easter brunch. Check out the tutorial below and see how to make your own.
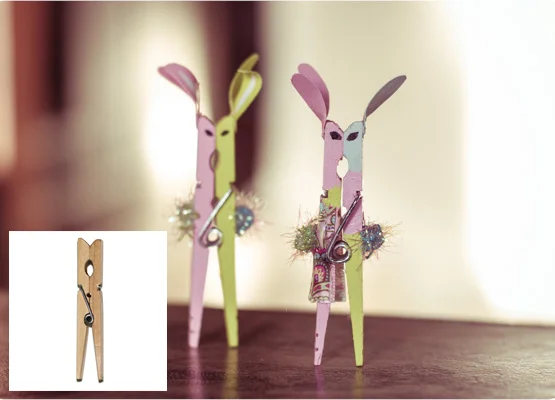

Kissing Easter Bunny Clothespins
What You Need
Wood Clothespin
Pastel, Black, and White Acrylic Paint
Hot Glue and Glue Gun
Construction Paper
Scissors
Wire Ribbon or Cotton for Tail
Optional (Desired Ribbon for Dress)
Directions
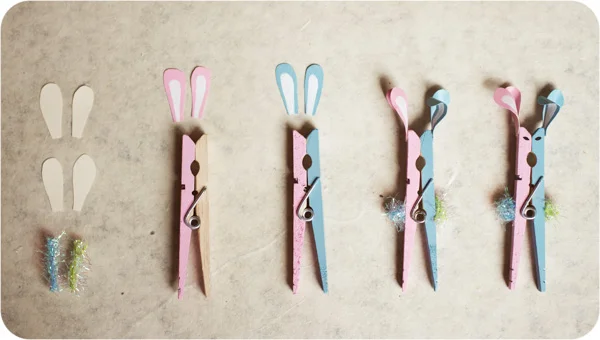
1. Using your scissors, cut out a small set of bunny ears for both sides of your clothespin so that you have four ears total, and two small pieces of your wire ribbon or cotton for your bunny tails. Set aside for later.
2. Now using the color you want for the first bunny (I chose pink), paint one half of your clothespin and one set of your bunny ears. Also paint a small white section in the middle of your ears once your color dries like pictured.
3. For the next step, Paint the other half of your clothespin with the second color you chose for the second bunny, along with your remaining set of unpainted bunny ears. Just like in step 2, paint a small white section in the middle of these ears as well once your color dries. (If making a dress for your bunny, proceed to optional step listed below, then proceed with steps 4 and 5)
4. Next, roll your small pieces of ribbon or cotton into small balls and using your hot glue gun, attach one to the back of each of your bunnies as their tail. Then, also using your glue gun, attach your ears to the back of the bunny heads, white strip facing in. To make the ears look cuter, slightly roll the ears so they face slightly outward. you can even roll them forward a little to give them a cute floppy look!
5. For the last step, use your black paint to make little eyes for your bunnies. That's it! Easy Peasy!
Optional
Using the ribbon you have chosen for your bunnies dress, cut a small piece for each side of your bunny and the back of your bunny that fits the width of each side and the back exactly at the top of the piece, getting slightly larger at the bottom. (Should look like a small triangle but with the point at the top cut off)
Using your hot glue gun, glue the sides of the dress on first. Then the attach the back piece. Make sure to glue the bottom edges of the back ribbon over the sides of the clothespin a little so it overlaps the side pieces slightly. The boy bunnies clothes can be painted on using different color pastel paints. (Proceed with steps 4 and 5 above)