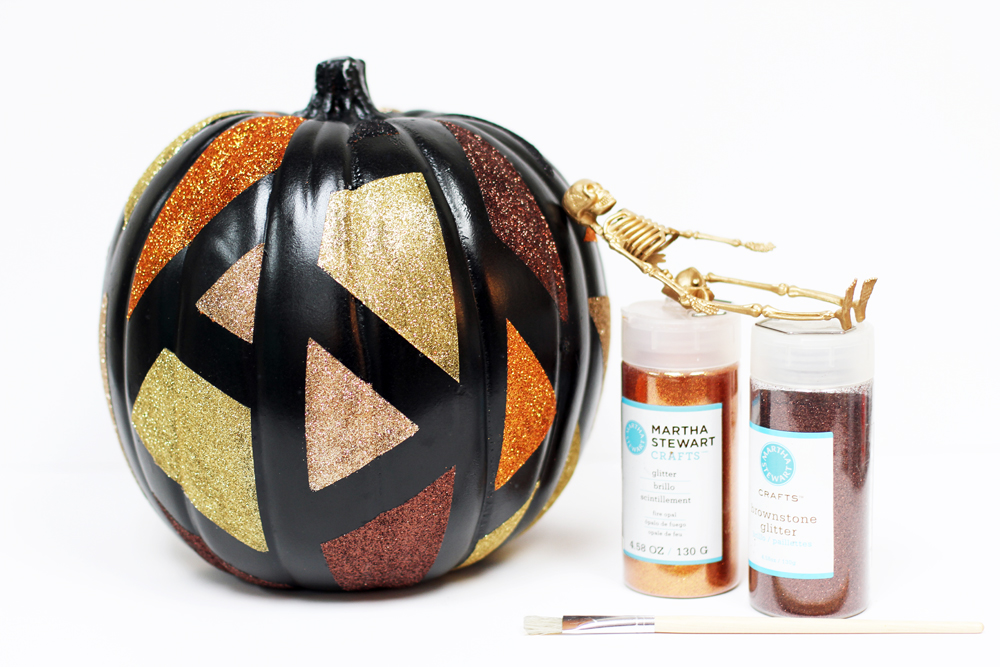
Geometric Glitter Pumpkin
3M meets Martha meets Black pumpkin.
Need I say more?
I call this the Geometric Glitter Pumpkin. Isn't she a beauty!? I used a fake pumpkin for this project because it requires a good amount of glitter and I wanted to save it year after year, but you could also use a real pumpkin with this as well. All you need is some 3M tape, fine glitter, and some Mod Podge. OK, let's get started.


Geometric Glitter Pumpkin
What you need
Fake or Real Pumpkin
Fine Glitter
Mod Podge
Paint Brush
3M Tape
Directions
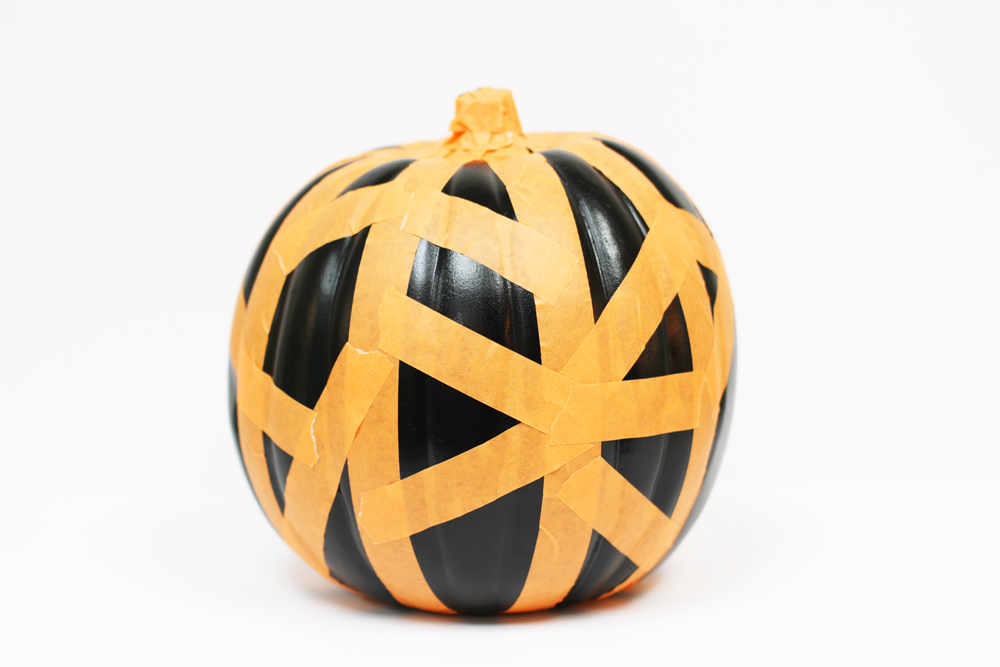
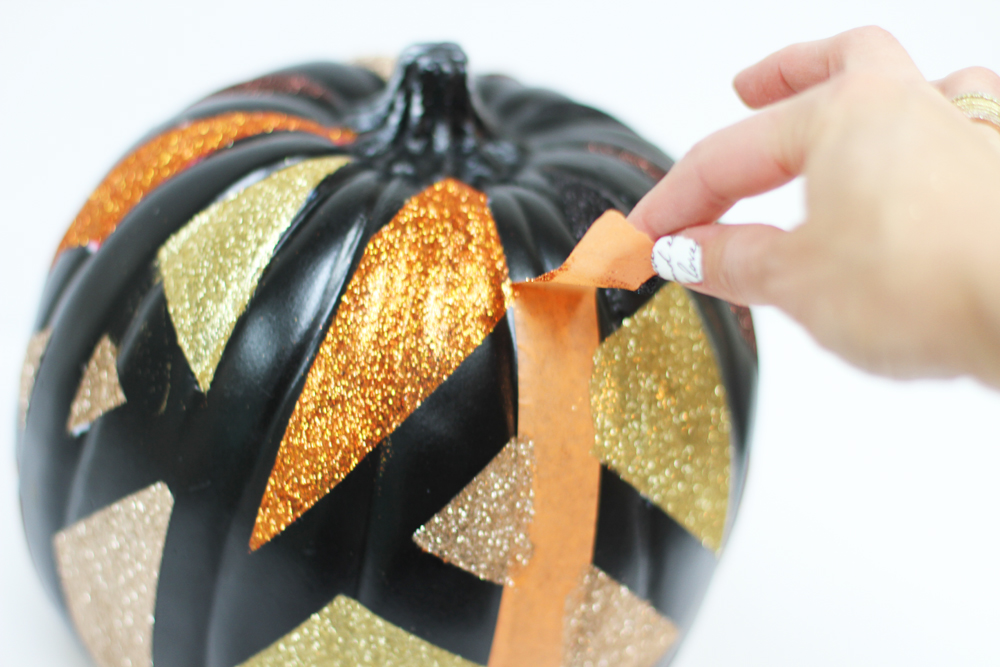
1. First tape up your pumpkin. Make sure to press the tape down really well because you don't want glue going under the tape. I put long strips going down the pumpkin and I did smaller random strips connecting the long strips to make triangles and other geometric shapes. Keep it random so it gives it style.
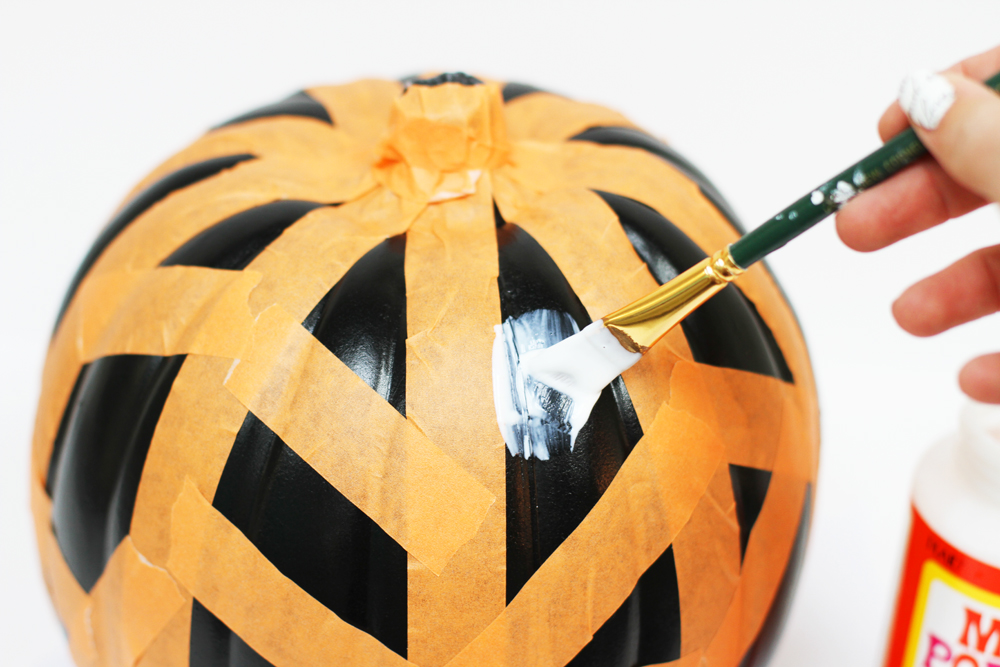
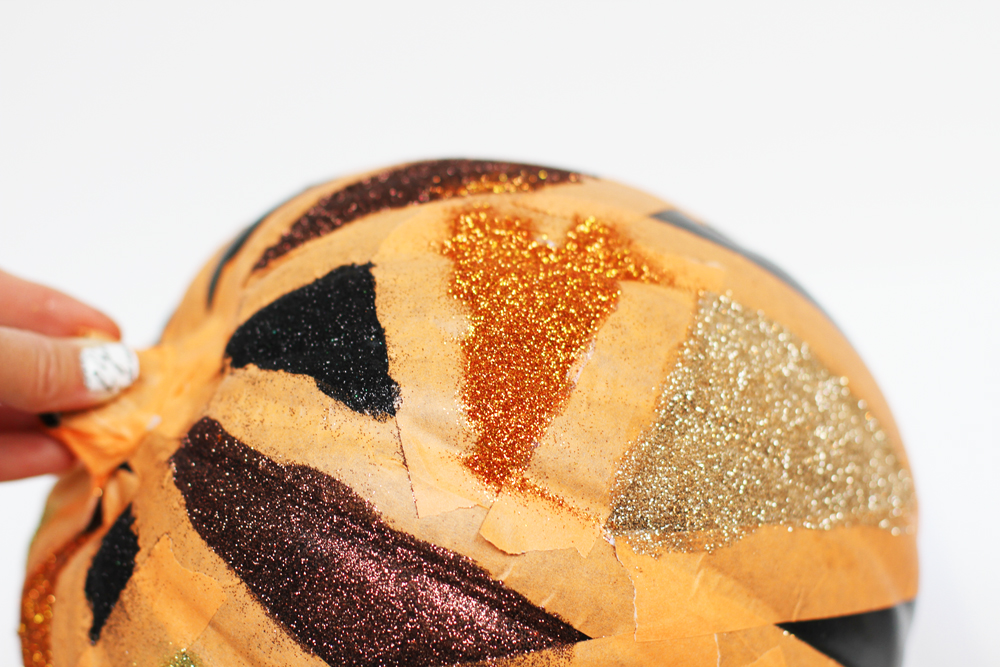
2. Now gently brush Mod Podge in between the tape. It's OK if you get some glue on the tape. Make sure to only brush 3 or 4 areas at a time that you plan on covering with the exact same color glitter. Once you sprinkle with glitter, tap the pumpkin so all the glitter falls off onto your paper so you can save it. Then continue with more glue and your second color. This way, you don't combine all your glitters and they go to waste. Let everything dry for about 20 minutes.
3. Carefully peel off the tape and use a dry paint brush to dust off any unwanted glitter.