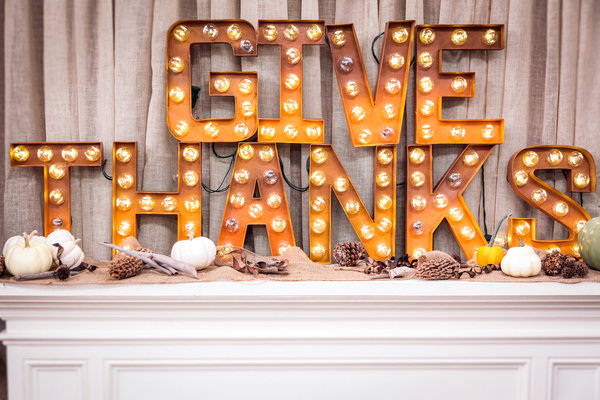
DIY Marquee Letters
These DIY Marquee Letters are awesome!
Right!?
You know itttttt.
They are actually pretty easy but they are super time consuming.
I cannnnnnnnot lie to you.
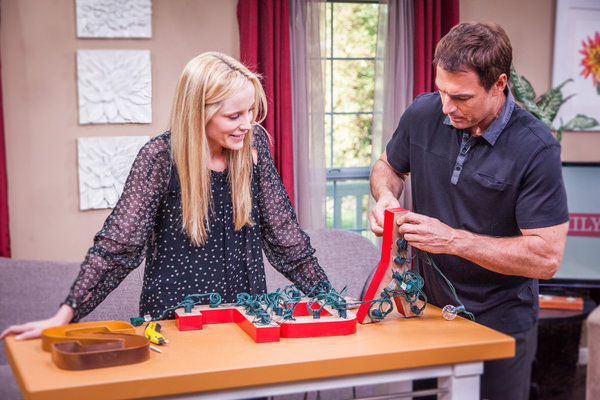
hat being said, if you just do your initials or "Love" or "Hi" instead of a giant long "Give Thanks" it won't take you as long. I made these last week on Home and Family on the Hallmark Channel. If you missed the episode you can scroll down for the tutorial! (I will post the step by step pics later this week .... sorry so busy!!) Happy Thanksgiving!
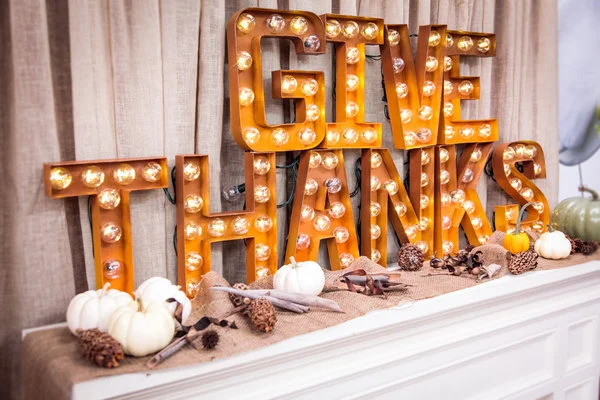
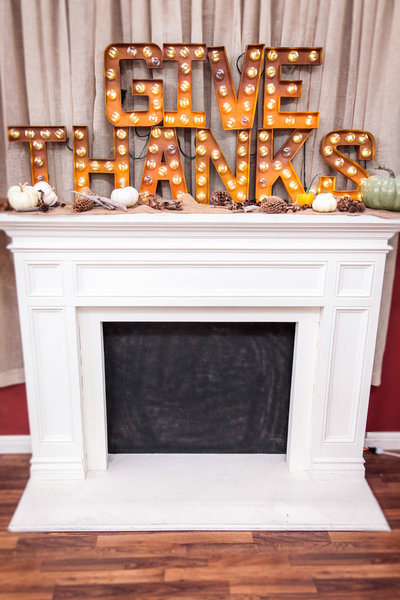
DIY Cardboard Marquee Signs
What you need
1. 12" inch cardboard 3D letters to spell out words of choice (available at Joann's Fabric)
2. Strings of large round "globe" light bulbs (amount varies based on size of your word)
3. Spray Paint (We used dark brown, medium brown, and Orange for the Ombre look on the "Give Thanks")
4. Exact-o knife
5. Box cutter
Directions
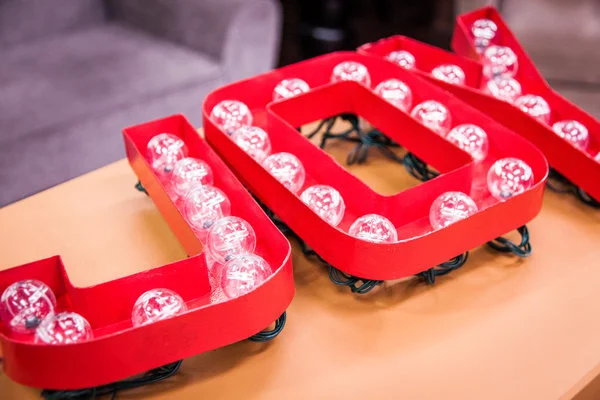
1. Using a box cutter, cut the front piece of cardboard off your letters so that they are set back and hollow.
2. Using an exact-o knife cut about ten small holes in the back of your letters so they are evenly spaced apart. Keep holes small! The holes should be large enough for the base of the light bulb itself to fit through but small enough so that the base you screw it into does not.
3. After you cut your holes out of the letters, use spray paint to paint your letters the color of your choice.
4. Once your paint dries, you're ready to attach your lights. Unscrew light bulbs from your strings of lights. One at a time push the base attached to the string of lights up against the back of your letters and then screw the bulbs back in from the front of the letters, through the hole. And voila! Done! Homemade, custom, marquee sign.