
DIY Wood Christmas Tray
Growing up, I always had different collections. It started with my super cool rock collection. I would get different rocks at the store in the mall ..... Oh my gosh, what was it called. Natural Beauties? No, Natural wonder? Natural Wonders? Anyway, I would get different rocks and put them all in this gray plastic rock case that had different sized dividers to separate all the rocks. Hahahahaha. Why do these things excite me? I am such a nerd - It's sick. I remember my parents were building a new house and they took me and my brother to a giant rock emplorium to pick out boulders for this waterfall they were building on the side of the pool. I walked around the rock lot, colelcting huge shards of rock. I remember picking up a huge piece of pink quartz. I actually still have it in my collection. After the rocks, I collected stickers, and I put 200 of them all around my door jamb so they were "on display". Then I started collecting Pogs. Do you remember that game!? I had a thing for the gold slammers. Oh, and the pink lucite slammer! After Pogs, it was Pez. My Dad would always surprise me with a new Pez dispenser after school. I still have all of the Pez in my craft room.
Now that I'm older I collect less toys and more kitchen items. I have a big collection of cake stands, water pitchers, salt and pepper shakers, and serving trays. I actually think I'm a bit of a hoarder. Lol. So below I made myself a wood plank serving tray and while you might feel overwhelmed because there are wood and nails involved, its fairly simple because you can buy these planks to size at the hardware store. Scroll down for the tutorial and if you have any crazy collections please let me know below!


DIY Wood Christmas Tray
What you need
3 pieces 24" x 5" wood
2 pieces 15" x 4" wood pieces
Nails
Wood Glue
Cabinet or door hardware (2 handles)
Screw driver/Hammer
Wood Stain
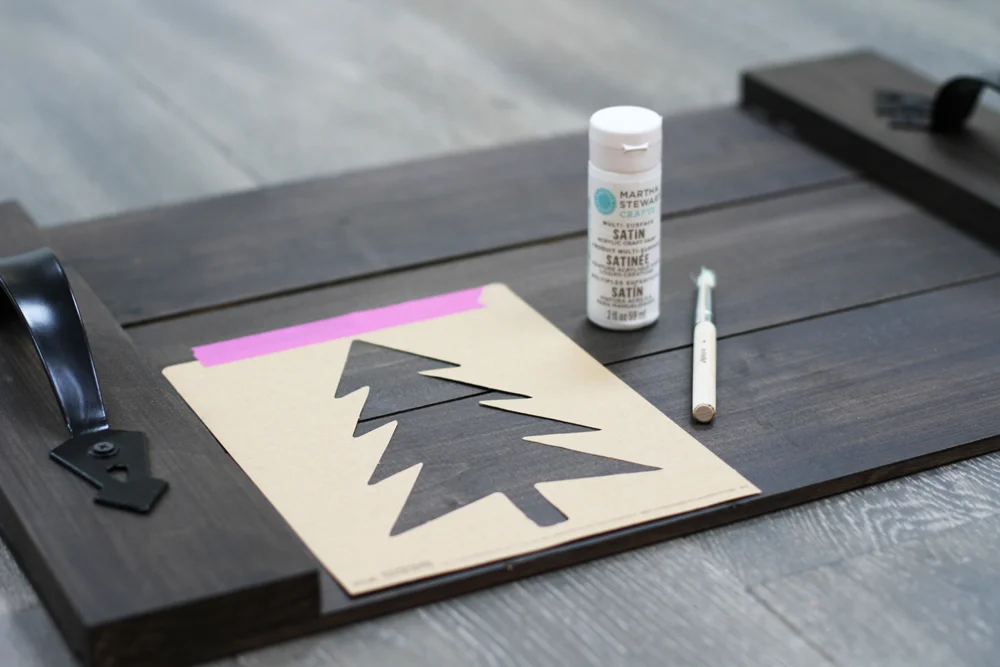
Stencils & Paint & Brush (optional)
Instructions
1. Stain all your wood pieces with wood stain and let dry.
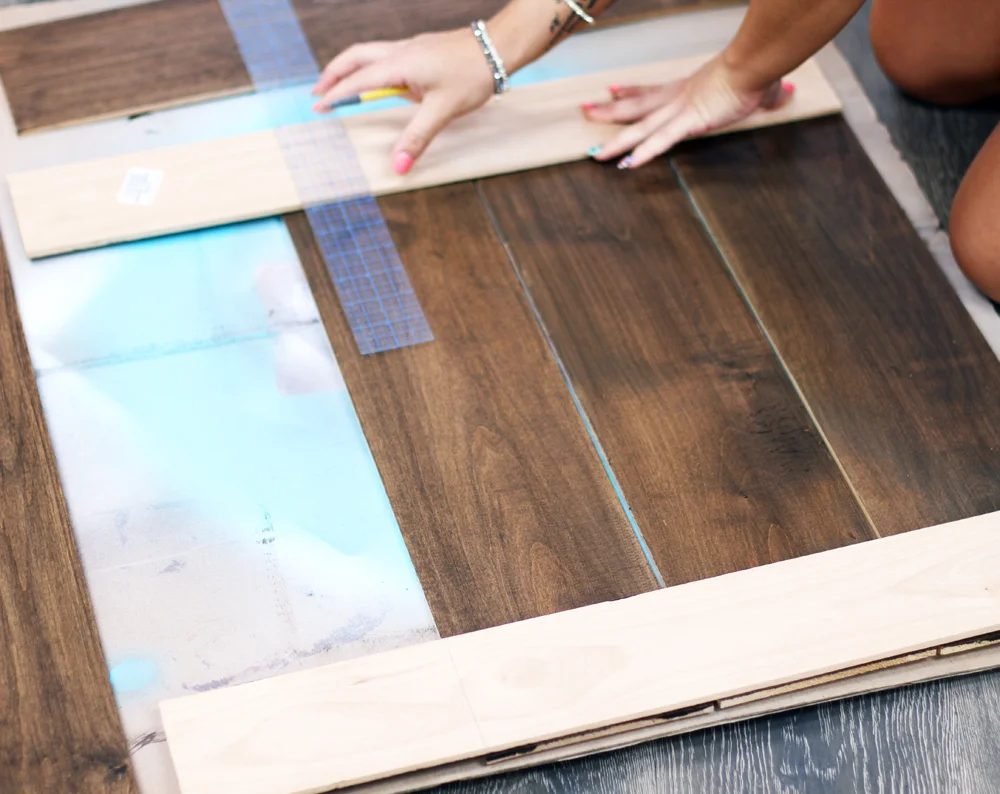
2. Lay your three 24" wood bases down and leave about a half inch in between the slats if you want it to look more like a tray crate.
3. Apply Wood glue to the sides of both ends of each of the three planks and carefully lay the two smaller slats over top the glue and press down to dry.
4. Hammer in Nails on the top of the wood plank that is laying across the three planks (6 nails total - 3 on each side)
5. Now lay your hardware on the edges of the tray and screw into place.
6. If you wish to stencil the tray, simply lay the stencil down and using a short, rough paint brush, dot your color into the stencil. Try not to brush back and forth as this will get paint underneath your stencil.
Tips: You can use any type of wood for this. You can add the hardware to an existing round piece of wood or use a pallet and take apart the planks. You could even use a cutting board and add this door hardware to it. Get creative!